Instructions for setting up the Old Bird 21c microphone (v2010)
Opening shipping box: There are four items inside the box - the Old Bird 21c microphone (the white bucket), 100-ft of white cable, a black connection box, a small white box with the AC power supply, and a black audio cable for connecting the signal from the black box to a computer, audio recorder, or speaker.
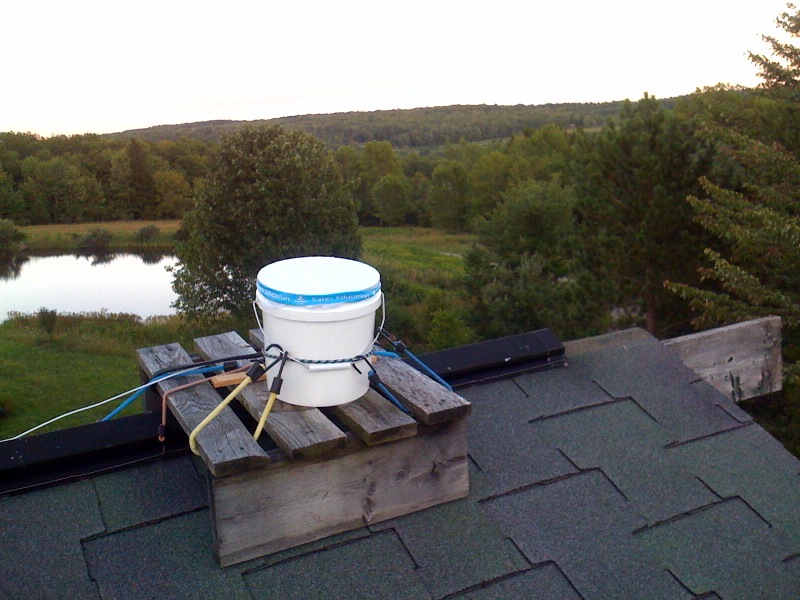
Take care when handling the microphone so that the cloth cover and its seal are not damaged. Although it is fairly robust, you shouldn't push down on the cover or set objects on it. Also, take care when handling the audio cable. To reduce the cost of the system we are using phone wire for audio cable. It works great but is more susceptible to damage after repeated bending. When uncoiling the cable we recommend inserting a dowel through the hole in the wire coil to unspool the wire. If you are not setting up a permanent monitoring station and are continually uncoiling and recoiling the cable, we recommend buying a hand-wind cable reel -- these can typically be found in the electric section of most hardware stores and sell for about $10.
Operation of equipment: The black box has two open holes, one is for the power supply and the other is for the included black miniplug audio cable. The other end of the miniplug audio cable goes to the microphone (or line level) input of your computer or audio recording device.
Once your mic is secured in location you can connect the audio cable. If you need to run the cable through a hole in a building to connect to your computer or audio system you can cut the phone wire, run the cable through a 1/4 inch hole in the building, then reconnect the wires on the inside.
Testing the microphone: When power is initially connected, the microphone emits five short tones in quick succession. If you are near the mic and have good hearing the tones are audible. You can test this to make sure the microphone is working before you mount it on a rooftop. To reproduce the tones, simply disconnect and reconnect the power supply cable to the black box. Once you have your microphone in position for listening/monitoring, check to make sure your monitoring device can detect the tones when you power up the microphone.
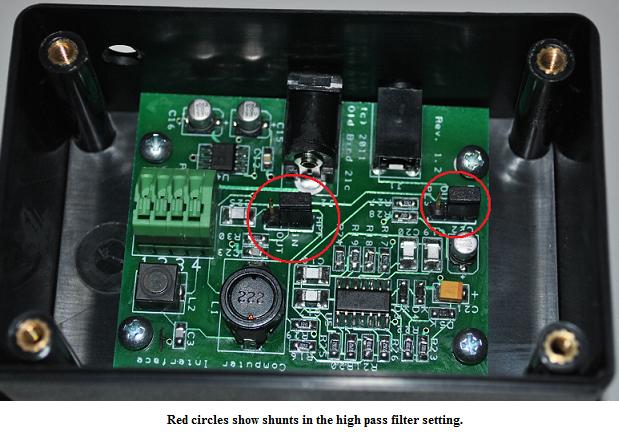
Removing the high pass filter: The 21c ships with a high pass filter in place that attenuates low frequency (below 1 kHz) sound levels. This is very useful for substantially reducing noise from wind, surf, auto & plane traffic -- and in such conditions greatly improves the flight call listening and monitoring experience for most species. However, the high pass filter does greatly limit the sensitivity of the microphone for a few species of night migrating birds such as Black & Yellow-billed Cuckoo and a number of herons and bitterns. If you don't have low frequency noise issues to deal with at your monitoring location, you may want to remove the high pass filter. To do so, use a Phillips head screw driver to open the the black box. On the circuit board inside are two "jumper-shunts". The microphone is shipped with the shunts connecting the "hpf" (high pass filter) and "In" pins. To remove the high pass filter simply lift off the shunts and reinsert them over the "In" and "Out" pins. The microphone will not work unless both shunts are connected.
If you have any questions, contact Bill Evans at:
ear2sky at
oldbird dot
org